3 Axis Center of Gravity Measurement Device
| [[File:|300px|center|alt=]] | |
| Sponsors | Schweitzer Engineering Laboratories |
| Team Name | The C.O.G's |
| Duration | 2018 - 2019 |
| Faculty Adviser | Dr. Michael Maughan |
| Mentor | Matthew Harned |
| Client |
|
| Team Members |
|
The goal of the project is create a device that measures the center of gravity of Schweitzer Engineering Laboratories' (SEL) products. The device must be able to automatically measure the center of gravity in all three dimensions.
Problem Definition[edit | edit source]
Background[edit | edit source]
SEL designs and manufactures many digital products that provide protection to electrical systems around the globe. One such product is their protective generator relay. During shipping, because the relays are exposed to shaking and/or vibration, they can potentially sustain damage. Because of this, SEL performs vibration tests on the relays to determine if any components will be damaged. Determining the center of gravity can help them improve the products sustainability against this damage.
Deliverables[edit | edit source]
- Proof of understanding of center of gravity measurement techniques
- Decision matrix of brainstormed solutions
- Proof of concept with at least a valid 1 axis measurement (Final Design must be capable of measuring 3 axes)
- Functional prototype, made using a variety of materials and methods
- Validated measurements using an object with a known center of gravity
- Plan for Final Design packaging OR repackage of another prototype
- Record of total cost and steps for duplication
- Final report containing full information listed above with detailed validation analysis
Requirements[edit | edit source]
- Automatically measures X, Y, and Z coordinates of an object's CG
- Withstands a load of up to 50 lbs
- Has a maximum size of 24" x 12" x 20"
- Able to measure the CG of a product that is rack mounted
- Operates while stationary
- Stretch goal: Able to operate during a vibration test
Project Learning[edit | edit source]
Preliminary Designs[edit | edit source]
Several preliminary designs were brainstormed in the early stages of the project, and while these designs were not fully implemented, the concepts of several were later implemented into the Final Design. The four preliminary designs that were decided against were the "Automatic Rotation", "Cantilever Beam", "Rack Mounted", and "Cantilever Beam with Box" designs.
Automatic Rotation[edit | edit source]
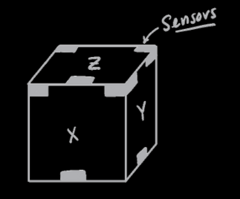
In the Automatic Rotation design, three force sensors each are placed on multiple faces of the product. The measurement of the three CG coordinates is made by summing moments about a datum in two different orientations. To find the CG coordinates in this design, the product would first be oriented with the sensors face down on a table. Using the force sensor readings, the X and Y coordinates of the CG can be found by summing moments about a datum. The product would then be rotated 90 degrees, and the Z coordinate can be found by once again summing moments. Since this method involves rotation, a mechanism that automatically rotates the product would need to be created to meet the requirement of minimizing user input.
While the Automatic Rotation design would meet the requirement of measuring all three CG coordinates, it is still flawed. Sensors required for every design take up the majority of the budget spending, so the design is cost inefficient due to the requirement of many sensors. It is also flawed in that the need for 90 degree rotation fails to meet the requirement for server rack mount capability. However, despite the Automatic Rotation not being the Final Design, the concept of creating a mechanism that automatically rotates the measuring device was still implemented.
Cantilever Beam[edit | edit source]
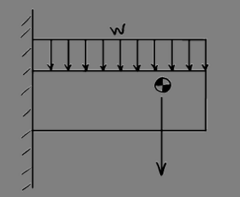
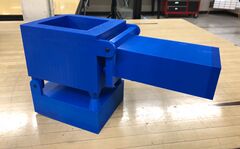
The Cantilever Beam design uses two force sensors and one torque sensor. The two force sensors are placed between the wall and cantilever beam, and the torque sensor is placed on top of the cantilever beam. The product that has its CG being measured is then placed on top of the beam which creates the reading on the force and torque sensors. It was hypothesized that this design would allow for the measurement of all three CG coordinates without having to reorient the device. If this were the case, the device would meet the requirements of minimizing user input, measuring all three coordinates, and rack mount capability.
However, after setting up the equations required to calculate CG coordinates, it was determined that all three coordinates could not be determined without tilting the beam to find the Z coordinate. After brainstorming ways to set this up, it was found that the reaction forces created by tilting the beam would prevent the Z coordinate from being calculable. Thus, this design was decided against. However, the concept of using a cantilever beam was later implemented into part of the AT-AT prototype design.
Cantilever Beam with Box[edit | edit source]
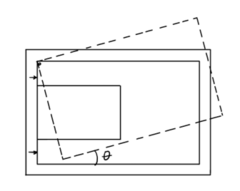
The Cantilever Beam with Box design is essentially an improvement to the Cantilever Beam design. In this case, the beam would be mounted to the inside of a box instead of a wall. Similar to the Cantilever Beam design, the device would need to be tilted in order to measure the Z coordinate of product's CG. However, now the box itself could be tilted instead of the beam, and the reaction forces of tilting the box could be neglected when calculating the Z coordinate of the product's CG.
The issue with the Cantilever Beam with Box design is that it requires much more material and space than the other designs, and thus would likely fail to meet the size and cost requirements for the project. This preliminary design was still useful though because the solution of tilting the object that the beam was attached to rather than the beam itself was also implemented in the AT-AT Prototype design.
Rack Mounted[edit | edit source]
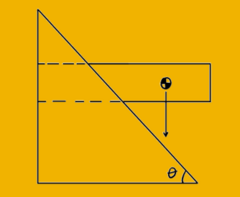
The Rack Mounted design is set up such that the product being measured is server rack mounted between two triangular plates. The design makes use of two strain gauges and one torque sensor. The strain gauges are placed along the diagonal edges of the plates, and the torque sensor is placed on top of the product. It was theorized that this setup could calculate all three center of gravity coordinates at once, given that the device was shaking up and down, causing a change in the strain gauge reading. Thus, this design was one of the few that could potentially meet the stretch goal of operating during a vibration test.
The Rack Mounted design was ultimately not pursued due to the fact that it could not calculate the CG coordinates without moving, i.e. it fails to meet the requirement of operating while stationary. Furthermore, it would only be able to calculate the CG coordinates while vibrating front to back or up and down, so ultimately it doesn't completely achieve the stretch goal either.
Prototypes[edit | edit source]
Prototype 1: "AT-AT"[edit | edit source]
The AT-AT Prototype was planned to make use of the Cantilever Beam design as well as two more force sensors to measure the CG coordinates. In theory, placing the two new force sensors under the "wall" of the Cantilever Beam design would allow for the calculation of all three coordinates of the CG without ever having to tilt the device. However, a statics analysis showed that device would at the very least need to be tilted in order to measure any CG coordinates at all. Furthermore, it required at least one more sensor than the next prototype designed. If the user desires high accuracy, sensors become significantly more expensive than most other parts. So when considering the recreatability of the Final Design, it can be seen that designs that successfully make use of less sensors are superior in that regard. Thus, the AT-AT prototype was abandoned and Star Destroyer design became the main focus.
Prototype 2: "Star Destroyer"[edit | edit source]
Mechanical Design[edit | edit source]
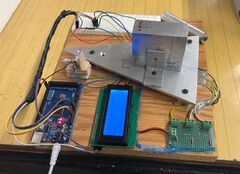
The Star Destroyer prototype makes use of three force sensors to calculate the three CG coordinates, and was the first design to successfully do so. In order to do so, a sum of moments is performed based on an arbitrary datum, which allows for the calculation of the X and Y coordinates of the CG. The top plate is then moved to a tilted orientation of known angle q, and kept in that position by replacing the leg at the tip of the triangle with a longer one. Summing moments once again in this orientation allows for the calculation of the Z coordinate.
Electrical Design[edit | edit source]
During testing of the Star Destroyer prototype, it was discovered that the CG coordinates were not being calculated properly. Eventually, it was discovered that the equations were written incorrectly in the code, but by this time assembly of the final design was nearly complete. While the prototype ultimately did not work until after it outlived its overall usefulness, the discovery of this coding error was vital for fixing and implementing the code for the final design.
Prototype 3: "Testing Prototype"[edit | edit source]
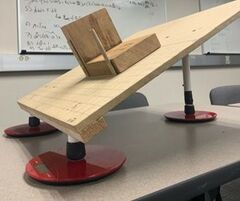
The Testing Prototype makes use of the same mechanical design to the Star Destroyer, but uses kitchen scales instead of Force Sensitive Resistors. The prototype serves as a proof of concept, so it does not use the same depth of electrical design as the Star Destroyer. Instead, the kitchen scale readings are entered into excel, and the same equations from the Star Destroyer design are used to calculate the CG coordinates. Thus, the design fails to meet the automatic measurement requirement because it requires the user to tilt the table as well as input force values themselves.
However, because the Testing Prototype does not suffer from the drawbacks of using many electrical components, it was actually more successful than the Star Destroyer. The Testing Prototype is able to successfully calculate all three coordinates of the CG of an object, as well as calculate them with reasonable accuracy. Thus, valuable data was gathered from testing with this prototype, and the Final Design was mainly based off this prototype.
Design Considerations[edit | edit source]
Strong Material[edit | edit source]
The material that the Final Design is made out of needed to be strong enough such that any plates would not deflect under the load of the measured object. However, higher strength materials were generally more costly. It was ultimately determined that aluminum would be the safest choice when considering strength and cost of materials.
Final Design Sensor Choice[edit | edit source]
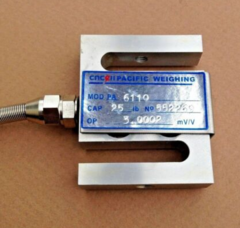
Originally, the product had a requirement of measuring the CG within 1.0% of the actual CG. It was determined that this could be done, but only by buying sensors that were too expensive for the budget given. This was reported to SEL, along with data from the Testing Prototype, and the 1.0% accuracy requirement was removed. The sensors for the Final Design were then chosen for the Final Design, based on their maximum load capacity and cost. The sensors' specs are:
- Maximum load: 25 lbs
- Cost: $70 (total for all three sensors)
These sensors unfortunately did not come with a data sheet, so their exact accuracy was unknown.
Uncertainty Analysis[edit | edit source]
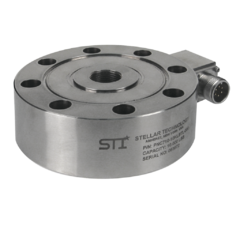
Because the accuracy of the S-type load cell sensors was unknown, an uncertainty analysis was unable to be performed on the final design based around these sensors. However, an uncertainty analysis was able to be performed to backsolve for required sensor accuracy in order to reach 1.0% accuracy or better of the CG measurements. Based on this sensor accuracy, we then chose the PNC710 model load cells made by Lord Sensing as a suggestion to SEL to use in a second iteration of the design. These sensors have the following specs:
- Maximum load: 200000 lbs
- Accuracy: 0.1%
- Cost: $915 (per sensor)
Final Design[edit | edit source]
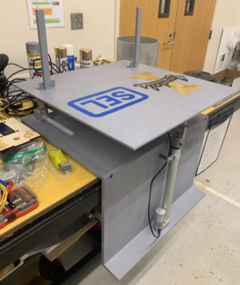
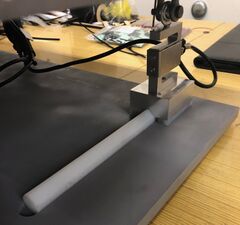
The product's Final Design works in a very similar fashion to the Testing Prototype, with two major differences. Firstly, it is more accurate due to its use of S-type load cells rather than kitchen scales. And secondly, it is fully automated. That is, it only requires one press of a button for it to eventually output all three coordinate axes. The main aspect of the testing prototype that was stopping it from being fully automated was the fact that user input was required to change orientation from non-tilted to tilted, as well as user input for calculations. To overcome this, the Final Design uses a linear actuator. After the x and y coordinates are measured, the linear actuator pushes up on side of the top plate, which has the object being measured on top of it, to create the tilted orientation. The z coordinate is then measured. With the arduino code, all of this is done automatically. For it to be mechanically possible, it was necessary to allow the lower edge of the top plate to move forward while it is being tilted. To create this movement, frictionless UHMW plastic tracks were attached to the plate as well as the blocks that the sensors are attached to. Together, these create the sensor tracks that guide the movement of the back edge of the top plate.
Team Members[edit | edit source]
| Kendall Gray
Major: Mechanical Engineering
| |
| Kaleb Cartier
Major: Electrical Engineering
| |
| Eric Smead
Major: Mechanical Engineering |
Additional Documentation[edit | edit source]
Project Schedule
Link:3 Axis CG Project Schedule
Meeting Minutes
File:3 Axis CG Project Group Meeting Minutes.pdf
Presentations
File:3 Axis CG SEL Fall Design Review.pdf
File:3 Axis CG Engineering Release Review.pdf
File:3 Axis CG SEL Spring Design Review.pdf
File:3 Axis CG EXPO Technical Presentation.pdf
