Machine Setup/Maintenance (MakerBot)
Main Article: 3D Printing
Makerbot prints by heating plastic and placing it in layers on the base plate. For this to work the machine must be printing onto a level plate, have enough filament, and maintain proper temperature.
Steps for Printing[edit | edit source]
| ||||||||||||||||||||||||||||||||||||||||||||||||||||||||||||||||||||||||||||
Secure Machine[edit | edit source]Makerbot shakes while making parts. If the machine is not secure this can create part deficiencies. Level machine by using a level or simply verify it doesn’t wobble. | ||||||||||||||||||||||||||||||||||||||||||||||||||||||||||||||||||||||||||||
Maintaining Tape[edit | edit source] | ||||||||||||||||||||||||||||||||||||||||||||||||||||||||||||||||||||||||||||
|
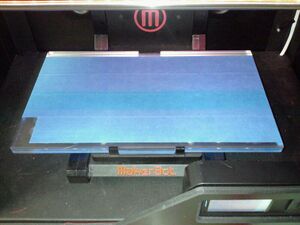
Masking tape is used on the tray of the MakerBot to make maintenance easier. At the beginning of every print the take a credit card and verify there are no bubbles in the tape and that is it laying flat. Remove bubbles if present. If the tape looks worn and replace it. Tape wears from pulling parts off, heat from the nozzle, and getting oils from hands on it. Blue masking tape can be found by asking around with the mechanical engineering faculty in Gauss Johnson. When placing new masking tape on the tray make sure it is flat. Any bubbles or overlaps will deform part bases. Also, leave the left front corner tape free. This allows the plastic to stick to the tray ensuring any plastic floating around the nozzle doesn't effect the print. |
||||||||||||||||||||||||||||||||||||||||||||||||||||||||||||||||||||||||||||
Leveling Base Tray[edit | edit source]The base plate must be level to avoid lopsided parts. The base plate should only be leveled if the second print attempt fails. If the print fails the first time, try lightly lifting the front left corner of the tray so it is almost touching the nozzle. This is necessary because the base plat is warped. On the main menu, select "Utilities → Leveling" and follow the instructions. When using a paper to check height the friction should be similar to using a set of feeler gauges. | ||||||||||||||||||||||||||||||||||||||||||||||||||||||||||||||||||||||||||||
Loading/Unloading Filament[edit | edit source]The filament will need to be unloaded/loaded if the user wishes to change the color or no filament is loaded. The load/unload commands can also be used to fix a jammed printer nozzle by unloading and reloading filament. Users should go through the load command whenever building parts even if filament is already loaded. This verifies the nozzle is not clogged. Filament should flow freely. Loading Filament[edit | edit source]To load filament, run the load command, on the main menu, select "Utilities → Change Filament → Load" and follow the directions. Unloading Filament[edit | edit source]To unload the filament, on the main menu, select "Utilities → Change Filament → Unload" and follow the directions.
| ||||||||||||||||||||||||||||||||||||||||||||||||||||||||||||||||||||||||||||
Preheating[edit | edit source]Before starting the part, the machine must be heated to the proper temperature for the plastic to flow properly. Typically the Machine will run between 220°-230°C. To preheat select "Preheat" on the main menu. | ||||||||||||||||||||||||||||||||||||||||||||||||||||||||||||||||||||||||||||
References[edit | edit source]http://download.makerbot.com/replicator/MB_Replicator_UserManual.pdf |
||||||||||||||||||||||||||||||||||||||||||||||||||||||||||||||||||||||||||||
