Wireless Forklift Height Encoder
|
Altitude |
|
Fall 2017 - Spring 2018 |
|
Hyster Yale Group |
|
|
|
|
|
|
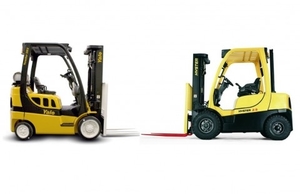
This project is sponsored by Hyster-Yale Group, who design and manufacture forklifts in the Portland, OR, area. The object of this project is to create a wireless system for accurately measuring the extension of a forklift. This measurement will be used by the operator to easily and accurately return to a given shelf height. It can also be used to implement new control methods, such as entering a numeric height, or having buttons with preset height values. This sensor will essentially take the guesswork out of forklift operation.
Problem Definition[edit | edit source]
Background[edit | edit source]
Hyster-Yale Group would like to incorporate a forklift height encoder in their products to improve usability as well as to incorporate autonomous operations. The problem with current height sensor designs is either cost, resolution, or durability. In order to meet these requirements, a small, wireless package that mounts on the mast of the forklift must be designed. This requires wireless data transfer as well as energy harvesting for long term, maintenance free operation.
Design Goals and Deliverables[edit | edit source]
- Select an appropriate sensing method
- Wirelessly transmit data to a receiver
- Harvest energy to allow sensor to run indefinitely
- Design a package that meets the sizing criteria
Specifications[edit | edit source]
Ideal Measurements
- 64mm x 90mm x 18mm
- Sampling Rate: 400Hz
- Measurement Resolution: 2mm
- Measurement Height: 7m
Acceptable Measurements
- Size: 127mm x 127mm x 25mm
- Sampling Rate: 32Hz
- Measurement Resolution: 25mm
- Measurement Height: 4m
Project Learning[edit | edit source]
Possible Sensor Solutions[edit | edit source]
After researching the design requirements and compiling the engineering specifications, four sensor designs were proposed.
- Hall effect sensor
- RF distance measurement
- Optical tracking
- Mechanical encoded wheel
All of these methods have been evaluated to some extent. The analysis of each method is below.
Hall Effect Sensor[edit | edit source]
This method utilizes an analog Hall effect sensor and alternating magnetic tape that would be applied to the mast of the forklift. As the sensor moves up and down the tape, the alternating magnetic field cause the sensor produce a sine wave. Knowing that the positive and negative peaks of this sine wave represent a change in direction of the magnetic field, a simple algorithm was developed to count how many had passed and convert the number to meters. With only one Hall effect sensor, direction of motion cannot be known. This can be rectified by placing another Hall effect sensor at a distance of a quarter lambda away from the first sensor and checking the slope of the sine wave. The Hall effect sensor was tested with great success. It had excellent precision and repeatability. The biggest problem with the system is that permanently securing the magnetic tape inside of the forklift mast could be difficult. It could also get in the way of other hardware on the mast. Below is a picture of one of the trials that we ran. It shows a clean, consistent signal, with acceptable amplitude.
RF Distance Measurement[edit | edit source]
This method was first thought of in order to reduce any mechanical components in the design. A transceiver would be mounted on the forks and another mounted somewhere on the truck, and RF manipulation could triangulate the relative positions. In order to meet the resolution specification, it was found that an antenna array would be necessary to sweep a highly directive beam in order to track the position of the transceiver on the forks. The size and cost of such an antenna array was prohibitive. Another method was to use LiDAR with a line of sight between the transmitter and receiver. Since LiDAR uses optical frequencies, this was ruled out because of scattering. The scattering problems were found during previous experimentation done by Hyster-Yale. Therefore, RF distance measurement has been removed from consideration for this project.
Optical Tracking[edit | edit source]
Although optical distance sensing such as LiDAR had been ruled out from the beginning, a surface tracking device would not suffer from the same scattering problems due to puddles and inconsistent environments. This method of measurement simply outputs a position delta at the sampling rate. These deltas can then be summed in order to get the total distance travelled.
Mechanical Encoded Wheel[edit | edit source]
This is essentially a fallback method, since it is a solved method of distance measurement, but it is very undesirable to have friction based sensing. This is because the wheel can slip over time, and it is also more prone to mechanical failure. This could be somewhat rectified by using a continuous rotary encoder with a reset sensor at the bottom of the forklift stroke. If slip did occur, it would simply recalibrate itself every time the forks were completely lowered. However, the durability problems cannot be entirely overcome.
Optical Tracking Experimentation[edit | edit source]
As we have worked through our potential designs, we have decided that the Optical Tracking device is the design we will pursue for the remainder of this course.
Initially, we had to test the accuracy of different types of optical sensors. We first purchased two LED optical sensors, deconstructed them, and inserted them into a 3D printed vehicle that could be run along a flat surface for multiple iterations, measuring distance traveled. We then purchased two laser optical sensors and built a conveyor belt using a stepper motor to test the long-distance and multiple-iteration accuracy of the sensor.
| LED Testing Process | |||||
|---|---|---|---|---|---|
| Title | Image | Description | |||
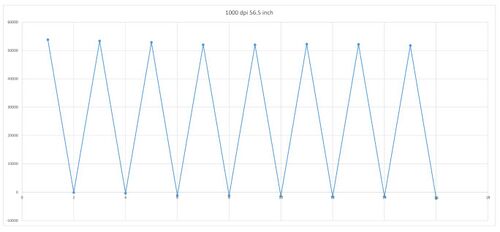
| Single Sensor Script Output, 11/15/17 | The graphical output of the single sensor tested above is shown at left. There is a slight downward trend in the distance the sensor believes it is measuring, but the error is reproducible and therefore can be cancelled with calibration. | ||||
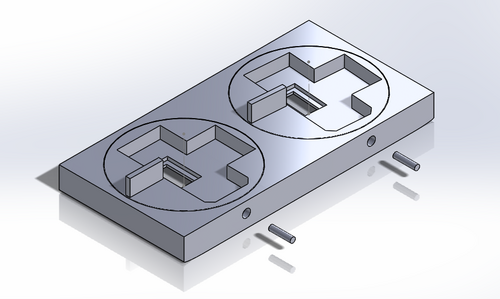
| Solidworks Vehicle, 11/18/17 | A component sensor vehicle was designed on Solidworks, so that we may run the sensor over a surface consistently. Shown left is the Solidworks model of the vehicle, suited to hold two sensors at varying angles. | ||||
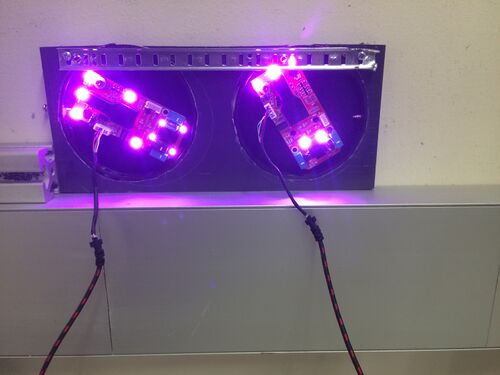
| Dual Sensor Testing, 11/28/17 | After receiving the above information, we decide to test our vehicles ability to decrease error by offsetting the angles of two sensors. We set both sensors in the vehicle and mounted them against the wall for testing. One sensor was set at 30 degrees off the axis of movement, another was set at 60 degrees. | ||||
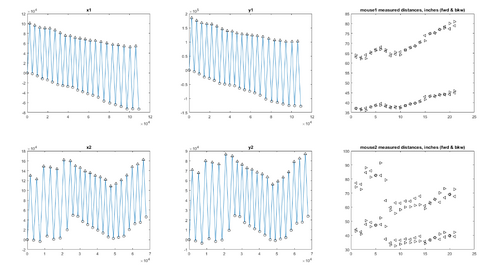
| Dual Sensor Data, 11/30/17 | The python script output data recordings from both sensors is shown at left.
TOP ROW: the data is from sensor 1. The first column is the data from the x axis, second column is data from the y axis, third column is accumulated distance traveled by the sensor. BOTTOM ROW: the data is from sensor 2. This sensor recorded massive error. This was caused by poor seating in our test fixture. | ||||
| Laser Testing Process | |||||
|---|---|---|---|---|---|
| Title | Image | Description | |||
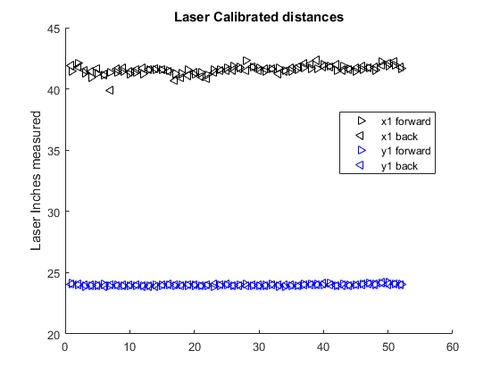
| Laser Sensor Testing, 12/6/17 | A single laser sensor was tested in similar ways as the LED to compare accuracy. As shown, the laser proved to be significantly more accurate. | ||||
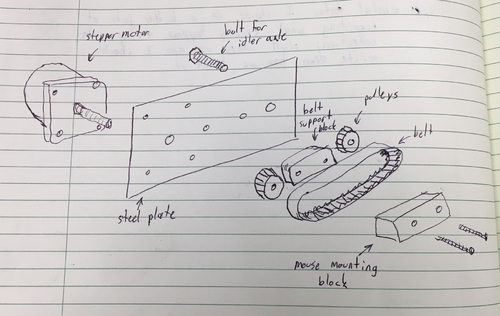
| Stepper Motor and Treadmill Design Preliminary, 1/12/18 | A preliminary design was drawn that would allow us to run a belt for a long period of time against the laser sensor. | ||||
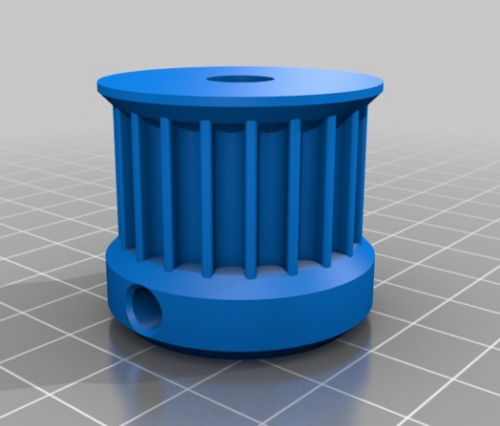
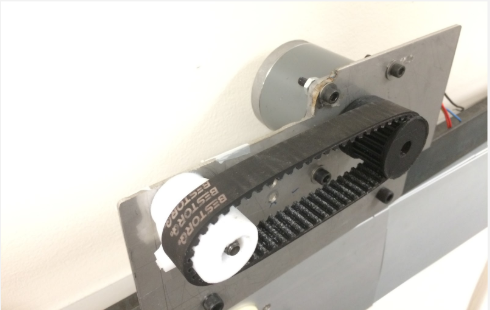
| Treadmill Pulley Design, 1/14/18 | A Solidworks model of the pulley was designed and printed that would allow us to power the pulley through a stepper motor and maintain tension on the belt. | ||||
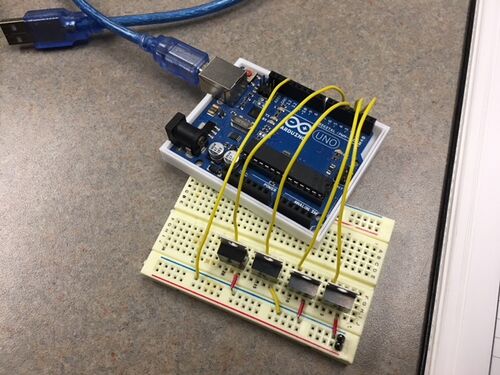
| Stepper Motor Control Circuit, 1/16/18 | A circuit was built that would control the action of the stepper motor. | ||||
| Stepper Motor and Treadmill Design Final, 1/16/18 | The design was constructed using a thin metal plate. A tensioning block was placed between the two pulleys to insure that the sensor could stay pressed flush to the belt. | ||||
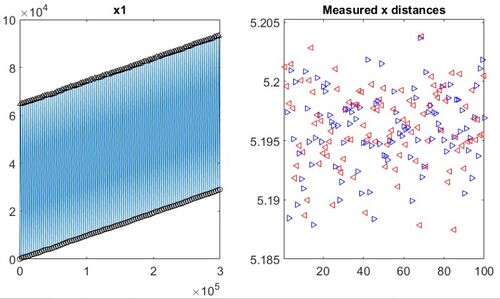
| Wired Testing Data, 1/18/18 | These tests yielded promising data as shown. Error in the data is between 0.2-0.3%, which is well within our limit. The upward trend is consistent and easy to take into account to prevent error buildup. | ||||
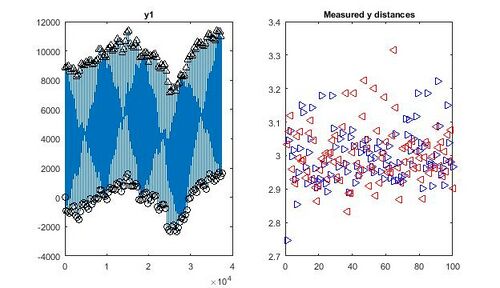
| Wireless Testing Data, 2/14/18 | As shown, the data coming from the wireless sensor is much less consistent and does not fall between our range of acceptable error. Therefore, in order for our communication to be wireless, we must develop our own wireless communication device using a Raspberry Pi. | ||||
| Construction and Manufacturing Process | |||||
|---|---|---|---|---|---|
| Title | Image | Description | |||
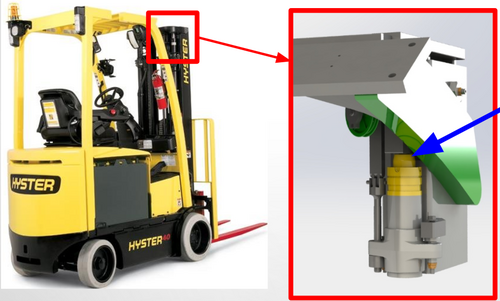
| Sensor Placement, 2/6/18 | Instead of mounting the sensor between the vertical beams on the forklift, we are mounting it on the hydraulic cylinder that powers the motion of the forks. This cylinder has more space around it for mounting, it moves without stuttering or jumping, and it is kept consistently clean by the wipers it passes as it enters the external cylinder. | ||||
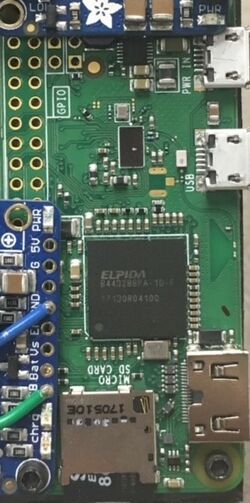
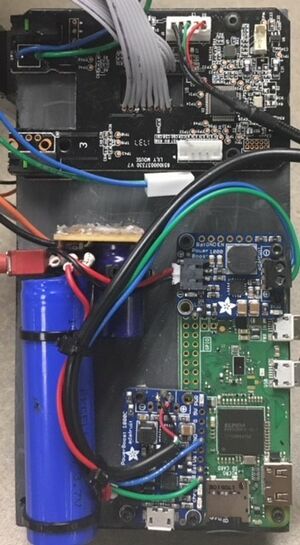
| Raspberry Pi, 2/20/18 | We have connected our wired sensor to a raspberry pi signal transmitter to decrease the error created by the wireless communication. | ||||
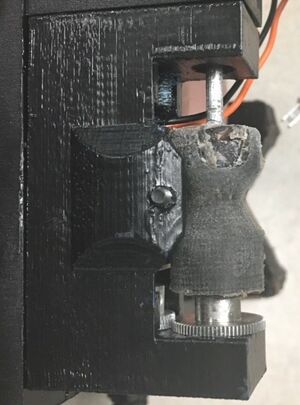
| Energy Harvesting Setup, 3/14/18 | In order to insure that our sensor does not need constant attention, we are implementing an energy harvesting system next to the sensor so that our battery is being perpetually charged via the motion of the piston. To do this, we have a custom molded wheel pressed against the piston, which is connected to a small DC motor. The motion of the piston will back-drive the motor, which will send a current into the battery. | ||||
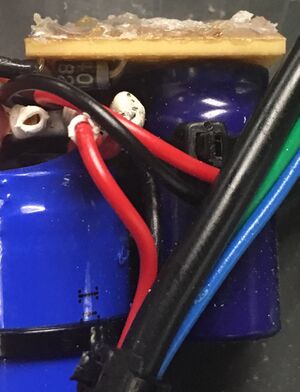
| Rectifying Circuit, 3/30/18 | We have built a rectifying circuit that is connected to our back-driven motor so we can charge the battery during both upward and downward piston motion. | ||||
| Sensor Mounting, 4/5/18 | The sensor will be mounted onto the cylinder as shown, along with the energy harvesting device (shown by the dark wheel). This attachment will keep the sensor from moving and will keep the friction wheel firmly pressed against the piston. | ||||
| Final Assembly | |||||
|---|---|---|---|---|---|
| Title | Image | Description | |||
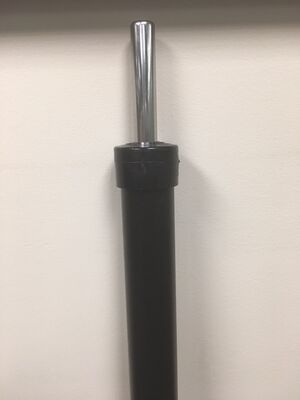
| Mock Piston, 4/8/18 | In order to test our apparatus, we built a mock piston that is a replication of the piston on one of Hyster-Yales forklifts. We used a chrome shower rod inside a section of black PVC pipe. Inside the pipe, we glued a straight bar to the PVC and build a runner on the shower rod so the rod cannot rotate, because if the rod rotated it would cause our sensor to detect more movement than is accurate. | ||||
| Circuit Box, 4/13/18 | Instead of mounting the sensor between the vertical beams on the forklift, we are mounting it on the hydraulic cylinder that powers the motion of the forks. This cylinder has more space around it for mounting, it moves without stuttering or jumping, and it is kept consistently clean by the wipers it passes as it enters the external cylinder. | ||||
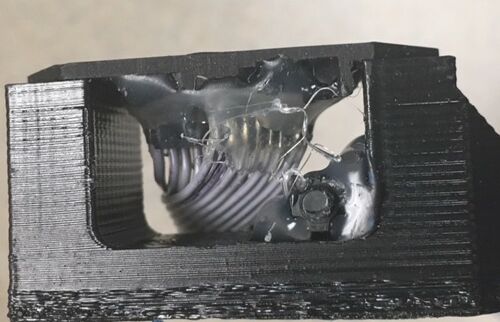
| Sensor Armature, 4/13/18 | In order to ensure that our sensor can be used on various different sizes of pistons, we build a moveable armature that attaches the sensor to the energy harvesting bracket. The slotted arm allows the sensor to move linearly away from the piston, while the rotating hinge allows the sensor to bend back to flush with the piston. This design enables us to equip every size of piston with the exact same design. The only initial changes that would need made is the armature would need adjusted to fit. | ||||
| Final Results | |||||
|---|---|---|---|---|---|
| Title | Image | Description | |||
| Results, 5/2/18 | ["https://www.youtube.com/embed/ZawVLJ2ATkk] | This is a video of our apparatus being manually extended and retracted while the height sensor is attached. As shown, the display on the screen measures the height. This display is similar to that which will be in the cab of the forklift. | |||
Team Information[edit | edit source]
| Picture | Bio | Discipline |
|---|---|---|
Austin Phillips:
Austin is a 4th year mechanical engineering major graduating may 2018. He chose this project for the challenge of creating a completely unique design to solve the problem presented by the Hyster Yale Group. He hopes this experience will pay off in his future career as a design engineer. |
ME | |
Brett Harned:
Brett is an electrical engineering student who is also finishing his minor in computer science. He is a transfer student from North Idaho College in Coeur d'Alene. He enjoys programming, embedded systems, wireless communication, and coffee. |
EE | |
Matthew Harned:
Matthew is a mechanical engineering student with primary interests in solid mechanics, modeling and simulation, and kinematics and control. He is planning on remaining at UI after he graduates to pursue a Master's degree in mechanical engineering. His interests include wilderness photography, skiing, and playing guitar and piano. |
ME | |
Preston Rhodes:
Preston is a senior at the University of Idaho studying mechanical engineering. His academic interests include engine design and solid modelling, while he also enjoys skiing, wrestling, and coaching. After graduation he plans on being a pastor. |
ME |
Document Archive[edit | edit source]
Gantt Chart[edit | edit source]
Project Schedule[edit | edit source]
File:2017 altitude projshcdl1.pdf
Meeting Minutes[edit | edit source]
File:2017 altitude minutes10 26 17.pdf
File:2017 altitude minutes11 1 17.pdf
File:2017 altitude minutes11 2 17.pdf
Presentation/Reports[edit | edit source]
File:2017 altitude gradpres.pdf
File:2017 altitude snaphot1pres.pdf
